
How to perform a quick check on a CANUSB adapter
2026-02-02
Power Consumption
After connecting CANUSB to an USB port the power consumption should be in a range of 50..60 mA (CAN side unconnected).
Driver Download
If the system is not able to provide the CANUSB with drivers automatically, please download FTDI driver package from the chip manufacturer‘s website.
Driver Settings
Please note: The screenshots in this manual were taken on a Windows 10 system. However, these instructions can be applied to other Windows versions as well.
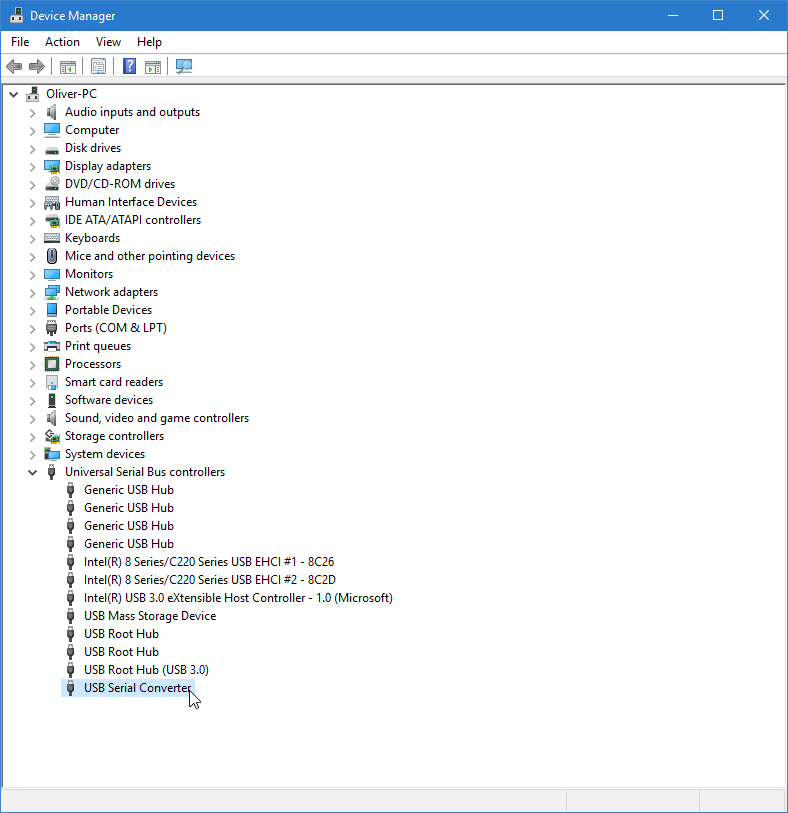
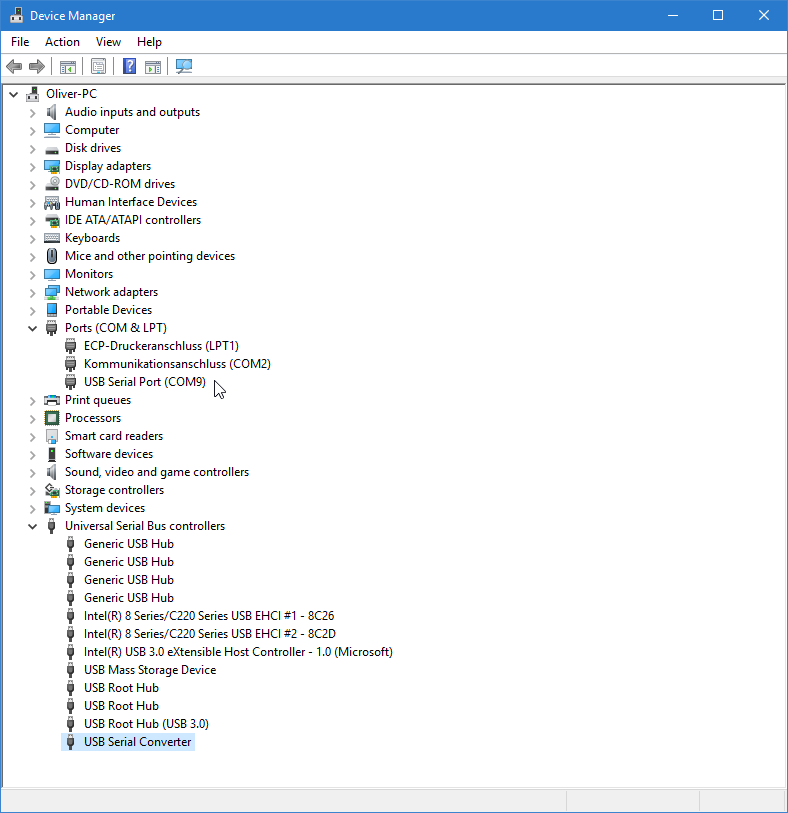
Start Device Manager. If drivers are installed properly, CANUSB will be listed in section „Universal Serial Bus controllers“ as „USB Serial Converter“:
Right-click „Properties“. The resulting dialog should look like this:
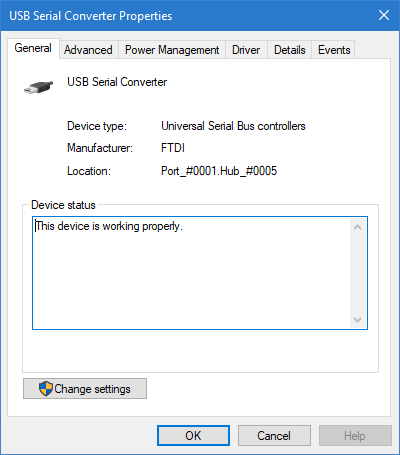
The unit is listed as every other FTDI-based serial adapter. If there are additional devices with identical list entry, we need to find out if this entry is the correct instance. Click on „Details“ tab and select „Bus reported device description“. It should show „CANUSB“:

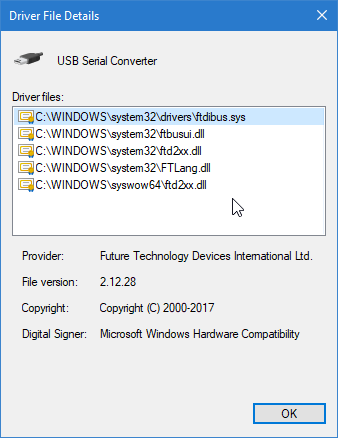
To further verify correct driver installation, click on „Driver“ tab and then click button „Driver details“:
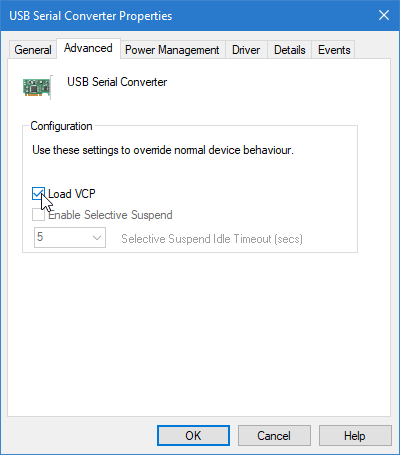
One more step to prepare further testing. CANUSB can be accessed via two driver models. One is D2XX which serves as the basis for CANUSB.dll. D2XX access is enabled by default. The other access method is via a virtual COM port. To enable this feature go to „Advanced“ tab and check the „Load VCP“ box:
Click OK to leave the dialog and re-plug the CANUSB unit. Once Device Manager window updates, there will be an additional COM port listed in section „Ports (COM & LPT)“. In our example, COM2 existed already (installed on motherboard) and COM9 is the new port which is associated with CANUSB:
Please note: the „Load VCP“ feature is not a system-wide setting. It needs to be enabled for each CANUSB unit connected to the system individually.
Serial Communication
After the above steps, we are able to communicate with CANUSB over a serial terminal using the ASCII commands described in the CANUSB User Manual.
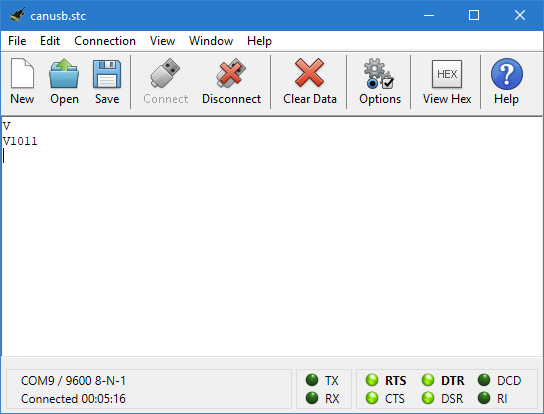
Use your favourite serial terminal software. The screenshots in this paper are taken from CoolTerm by Roger Meier.
Set up the correct COM port (COM9 in our example) with protocol setting 8N1 (default). Baudrate setting is actually not important - 9600 Baud (or any other) will do, for instance.
Set the ENTER key behaviour to generate <CR> (not <CR> + <LF> !). Enable local echo (otherwise the characters you input will stay invisible).
Then type:
- V<ENTER>
This will result in a version information reponse, like:
Set the desired CAN bitrate, for instance 125 kbit/s:
- S4<ENTER>
Then open the CAN channel:
- O<ENTER>
Please note: Before CANUSB is ready to transmit and receive CAN messages, make sure there is at least one other device connected to the CAN bus. Otherwise a bus error will be detected.
The following command will transmit a standard CAN frame (11 bit identifier) with just one byte payload (value $0F) to node address $423:
- t42310F<ENTER>
For further instructions on ASCII command structure and response codes, please refer to the CANUSB User Manual.